How to: Add the Ringsurf Navigation Code to your blog?
edited: 22 May 2007, THESE INSTRUCTIONS ARE FOR CLASSIC BLOGGER; INSTRUCTIONS FOR BLOGGER BETA WILL BE ADDED SHORTLY...
To retrieve the code you need to log in to your Ringsurf account, using the ID and PASSWORD that you were e-mailed when you joined. This will take you to the 'Admin' or 'Edit' screen, where your personal information is stored:

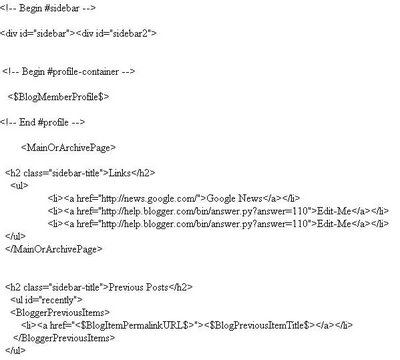
Scroll down the page to the Site Code dialogue box, and copy everything from <table border=1> down to </table>. Next, you need to paste the code into your blog template, somewhere in the sidebar. To do this, log in to Blogger and from the DASHBOARD, select the blog you wish to edit. Click on the TEMPLATE tab and scroll down to the SIDEBAR tags, featured in the screenshot below:
 Somewhere between the <!--End#profile--> and <!--End#sidebar--> tags, type the following code which will be our heading:
<h2 class="sidebar-title">Webrings<:/h2>
<ul>
</ul>
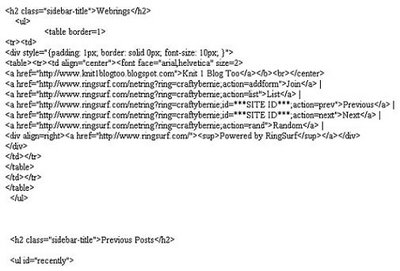
Next, paste the Ringsurf code between the <ul> and </ul> tags. When you're finished, it should look something like this: I hope this helps. Email me if you have any problems.
Bernie.


No comments:
Post a Comment