Ringsurf Navigation Code - how to format the code to fit your site!
I have been asked how to modify the navigation code to fit in with the look of your own site. Here are some simple instructions explaining what each piece of code refers to and how to format it:
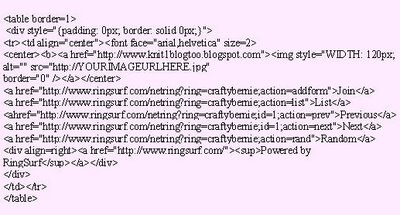
(this is how the code looks when you want to include the Button for the ring)
- Table Border = 1
(you can remove this or make the border thicker by increasing the number)
- Padding: 0px (you can increase the padding around the image and text in the box - space between text and the margin)
- td align="center" (you can align it "left" or "right")
- font-face="arial,helvetica" size=2 (you can change font type from arial to times new roman, for eg. Also, you can change size of the font by increasing the number for a bigger text or reducing it for smaller text)
- img style="WIDTH: 120px; (you can make the picture bigger or smaller by
increasing or reducing the number of pixels or px)
- replace the "http://YOURIMAGEURLHERE" with the URL that you have saved the button to (ie flickr or photobucket)
NB: The code in the picture above is a copy of the navigation code on my website but please don't copy and paste this into your template as it won't work properly.


No comments:
Post a Comment