For a complete list of How To's follow this link.
If you're looking for something else,
check out the LABELs drop down menu.
Showing posts with label Navigation code. Show all posts

Tuesday, May 22, 2007

How to: Add Ringsurf Navigation to Blogger Beta Blogs

The instructions below are for Blogger Beta Blogs only.
For Classic Blogger templates, please see this post.
The Ringsurf navigation code should be copied from your Ringsurf account and put in your blog sidebar where it can be seen by the rest of the blogosphere.

To retrieve the code you need to log in to your Ringsurf account, using the ID and PASSWORD that you were e-mailed when you joined. This will take you to the 'Admin' or 'Edit' screen, where your personal information is stored:
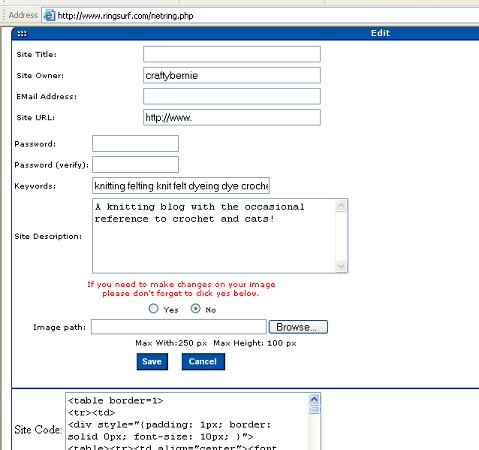

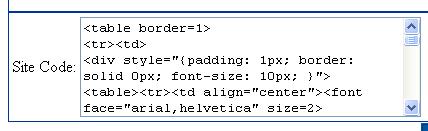
Scroll down the page to the Site Code dialogue box, and copy everything from <table border=1> down to </table>. You can use CTRL A or CTRL C to select and copy in one go.
Next, you need to paste the code into your blog, somewhere in the sidebar. To do this, log in to Blogger Beta and from the DASHBOARD, select the blog you wish to edit. Click on the TEMPLATE tab and select the Add and Arrange Page Elements screen.

Add & Arrange Page Elements ScreenshotThe Navigation code should be added to your blog as follows: Select Add a Page Element.

Add Page Element screenshotFrom the Choose New Page Element screen, open a new HTML/Javascript element by clicking ADD TO BLOG.

HTML/Javascript dialogue boxPaste the code into the content box and Save changes.

If you are a member of more than one netring, you can choose to either save the information for each ring in it's own separate HTML/Javascript element or you can store the information for all your rings in one HTML/Javascript element.

For help with adding a button to Blogger Beta check out the Add a Button in Blogger Beta post. This assumes you have saved a copy of the button you wish to use.

For help with loading photos to blogger you can check out this post where it also explains how to link a button to a webpage.

If you have any questions at all please do not hesitate to contact me.

Thursday, August 31, 2006

How to: Add the Ringsurf Navigation Code to your blog?

edited: 22 May 2007, THESE INSTRUCTIONS ARE FOR CLASSIC BLOGGER; INSTRUCTIONS FOR BLOGGER BETA WILL BE ADDED SHORTLY...

The Ringsurf navigation code should be copied from your Ringsurf account and pasted into your template, somewhere in the sidebar where it can be seen by the rest of the blogsphere.

To retrieve the code you need to log in to your Ringsurf account, using the ID and PASSWORD that you were e-mailed when you joined. This will take you to the 'Admin' or 'Edit' screen, where your personal information is stored:


Scroll down the page to the Site Code dialogue box, and copy everything from <table border=1> down to </table>.

Next, you need to paste the code into your blog template, somewhere in the sidebar. To do this, log in to Blogger and from the DASHBOARD, select the blog you wish to edit. Click on the TEMPLATE tab and scroll down to the SIDEBAR tags, featured in the screenshot below:

Somewhere between the <!--End#profile--> and <!--End#sidebar--> tags, type the following code which will be our heading:

<h2 class="sidebar-title">Webrings<:/h2>
<ul>
</ul>

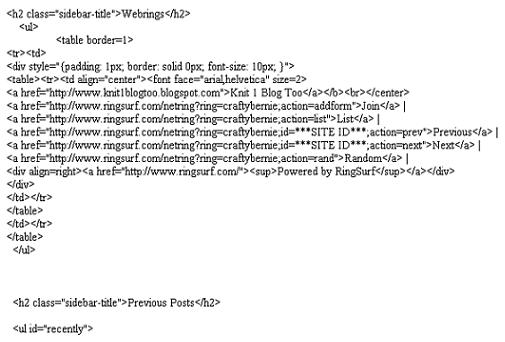
Next, paste the Ringsurf code between the <ul> and </ul> tags. When you're finished, it should look something like this:

I hope this helps. Email me if you have any problems.

Bernie.

Friday, July 14, 2006

Ringsurf Navigation Code - how to format the code to fit your site!

I have been asked how to modify the navigation code to fit in with the look of your own site. Here are some simple instructions explaining what each piece of code refers to and how to format it:

(this is how the code looks when you want to include the Button for the ring)


  • Table Border = 1
    (you can remove this or make the border thicker by increasing the number)

  • Padding: 0px (you can increase the padding around the image and text in the box - space between text and the margin)

  • td align="center" (you can align it "left" or "right")

  • font-face="arial,helvetica" size=2 (you can change font type from arial to times new roman, for eg. Also, you can change size of the font by increasing the number for a bigger text or reducing it for smaller text)

  • img style="WIDTH: 120px; (you can make the picture bigger or smaller by
    increasing or reducing the number of pixels or px)

  • replace the "http://YOURIMAGEURLHERE" with the URL that you have saved the button to (ie flickr or photobucket)

NB: The code in the picture above is a copy of the navigation code on my website but please don't copy and paste this into your template as it won't work properly.