
How to: Upload a picture to Blogger
I'm bumping this post from Nov '06 up to 2008 for anybody who has problems uploading photos to blogger. If this doesn't help, email me and I'll see what I can come up with. Thanks..Bernie
Here's a scenario to explain how to upload the Knit1BlogToo Button on to Blogger from your PC.
Create a new post in Blogger.
Click on the 'Add Image' button.
When the 'Add an image from your computer' dialogue box opens, select BROWSE.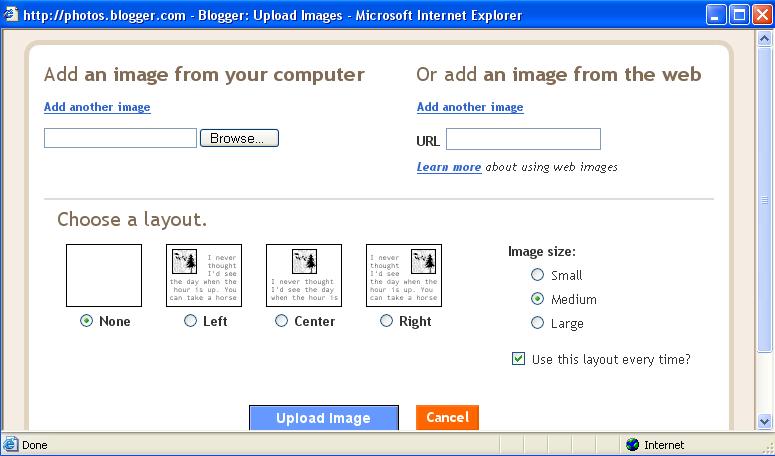
This will open up a folder on your PC so you can retrieve the picture you want.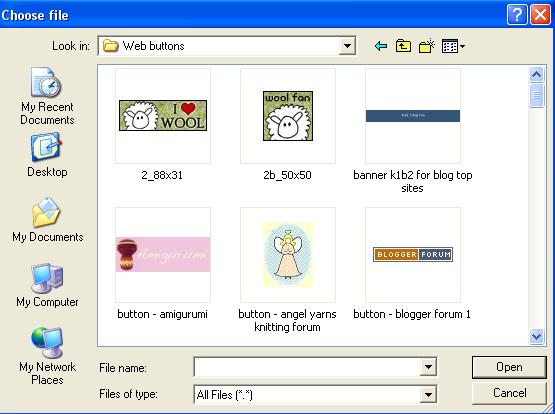
Choose how you want the picture to be aligned in the post** by choosing a layout.
When the picture is uploaded, this is the HTML that will appear on your post:
<a href="http://photos1.blogger.com/blogger/7556/2731/1600/knit1blogtoo%20button%20re%20tutorial.0.jpg"><img style="cursor:pointer; cursor:hand;" src="http://photos1.blogger.com/blogger/7556/2731/320/knit1blogtoo%20button%20re%20tutorial.0.jpg" border="0" alt="" /></a>
And this is the picture:
**To set the alignment of the picture or CHOOSE A LAYOUT, i.e. place it to the left, to the right, or in the center, you need to do this when you select the file to upload. The bottom of the dialogue box gives you the option to select the formatting you want:
NONE
LEFT
CENTER
RIGHT
If you select NONE, the picture will be plonked in the top left hand corner of your post and any text that you add to the post will simply start where the picture ends.
If you select LEFT, the picture will be aligned to the lefthand side of your post and any text you add will wrap around the picture on the right.
If you select CENTER, the picture will be aligned in the center top of the post.
If you select RIGHT, the picture will be aligned to the righthand side of your post and any text you type will wrap around the picture on the left.
To add a link to this picture, see How to: Add a link to a button or photo
Don't forget to check out Blogger Help and/or Blogger Help Group on Google for further information.