
For a complete list of How To's follow this link.
If you're looking for something else,
check out the LABELs drop down menu.
Showing posts with label add image. Show all posts

Thursday, January 31, 2008

How to: Upload a picture to Blogger

I'm bumping this post from Nov '06 up to 2008 for anybody who has problems uploading photos to blogger. If this doesn't help, email me and I'll see what I can come up with. Thanks..Bernie

Here's a scenario to explain how to upload the Knit1BlogToo Button on to Blogger from your PC.

Create a new post in Blogger.

Click on the 'Add Image' button.

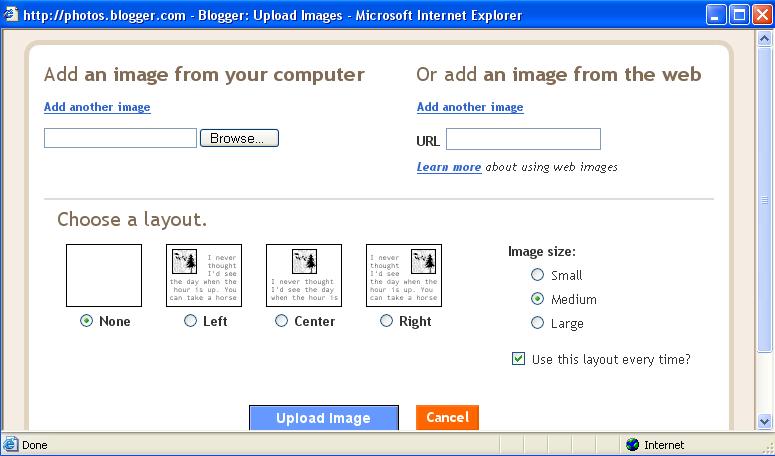
When the 'Add an image from your computer' dialogue box opens, select BROWSE.

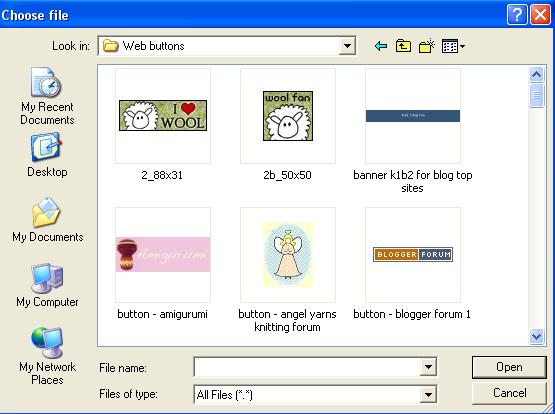
This will open up a folder on your PC so you can retrieve the picture you want.

Choose how you want the picture to be aligned in the post** by choosing a layout.

When the picture is uploaded, this is the HTML that will appear on your post:

<a href="http://photos1.blogger.com/blogger/7556/2731/1600/knit1blogtoo%20button%20re%20tutorial.0.jpg"><img style="cursor:pointer; cursor:hand;" src="http://photos1.blogger.com/blogger/7556/2731/320/knit1blogtoo%20button%20re%20tutorial.0.jpg" border="0" alt="" /></a>

And this is the picture:


**To set the alignment of the picture or CHOOSE A LAYOUT, i.e. place it to the left, to the right, or in the center, you need to do this when you select the file to upload. The bottom of the dialogue box gives you the option to select the formatting you want:

NONE
LEFT
CENTER
RIGHT

If you select NONE, the picture will be plonked in the top left hand corner of your post and any text that you add to the post will simply start where the picture ends.

If you select LEFT, the picture will be aligned to the lefthand side of your post and any text you add will wrap around the picture on the right.

If you select CENTER, the picture will be aligned in the center top of the post.

If you select RIGHT, the picture will be aligned to the righthand side of your post and any text you type will wrap around the picture on the left.

To add a link to this picture, see How to: Add a link to a button or photo
Don't forget to check out Blogger Help and/or Blogger Help Group on Google for further information.

Thursday, August 09, 2007

Pictures/images - resizing

Thank you bingeknitter so much for typing up the tutorial on posting pictures side by side. I don't actually use tables myself but I have often wondered how I could use them just for this purpose. It was very helpful.

Regarding the resizing of photos/images, I haven't tried it in the table format so I'm not sure whether the following would work, but it's worth a go...

Again, brackets should be changed to either <> appropriately.

The image URL will start with http:// and will end in jpg. or jpeg.

(table)(tr)(td)
(img src="image URL"/)
(/td)(td)
(img
src="image URL"/)(/td)
(/tr)(/table)

Inserting an img style tag between the image URL and the img src tag, should allow you to format any image or photo that you post to your blog. When you upload an image to Blogger, look at the HTML view of the image and you'll see tags that look similar to this:

(a href="http://i71.photobucket.com/albums/i146/craftybernie/P7260027.jpg")(img style="FLOAT: left; MARGIN: 0px 10px 10px 0px; WIDTH: 200px; CURSOR: hand" alt="" src="http://i71.photobucket.com/albums/i146/craftybernie/P7260027.jpg" border="0" /)(/a)

The first part is the address or the URL of the photo - this is where people will be directed to when they click on the image itself (you can change this to your blog or another website):

(a href="http://i71.photobucket.com/albums/i146/craftybernie/P7260027.jpg")

The second part is the style of the image, namely the formatting of the image -
FLOAT:LEFT; - the image is aligned to the left of the post.
MARGIN: 0px 10px 10px 0px; - there is a margin or space of 10 pixels at the
right & bottom of the image.
WIDTH: 200px; - the image is 200pixels wide (you can make the image bigger
or smaller by increasing or decreasing this figure)
(img style="FLOAT: left; MARGIN: 0px 10px 10px 0px; WIDTH: 200px; CURSOR: hand" alt=""

The last part is the actual source of the image, namely where the photo is being hosted on the internet (photobucket/flickr/picasa, etc). Do not change this!

src="http://i71.photobucket.com/albums/i146/craftybernie/P7260027.jpg" border="0" /)(/a)